People often ask what I do/use to edit. This isn't an exciting picture but I didn't want to over think what picture to use. Obviously each picture undergoes different editing but generally my steps are somewhat the same.
1. We always, always shoot in RAW (the camera doesn't `develop' the picture for you, you have the control to do what you want afterwards).
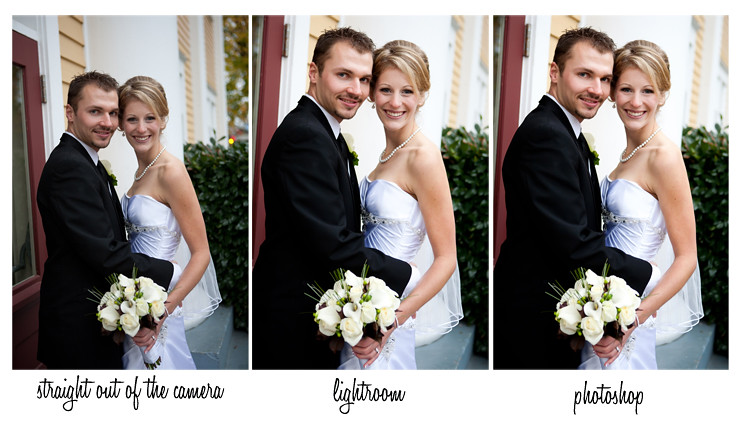
2. Then, we import into Lightroom. Now, if you are looking for editing software, it is great. You can try a 30 day trial for free. Anyway, the things that I usually do in lightroom are similar to what I did for this picture. The amounts are always different but the steps are usually somewhat similar.
a. Crop
b. Reduce noise (by 80%..you know, all that grainy stuff)
c. Increase exposure (+.6, brightens it up)
d. Contrast (+47)
e. Black (7)
f. Highlights (-7, gets rid of some of the bright parts from increasing exposure)
I always edit all my photos in lightroom and convert them to black and white as well. Each photo is so different, and other things might include; white balance, temperature, vignetting etc. Then, I go through the photos again in photoshop. I don't edit all the photos there, I just do some that need it. Usually 1/3 of them.
3. Photoshop. In this case I used the clone stamp tool under their eyes and reduced it to 48% opacity so the lines under the eyes are still realistic, just not dark circles. I also increased the contrast by 5. If someone had a big zit, cold sore, or stamp on their hand etc, I would also edit that here in photoshop.
I know I don't post on here very often but that was a question that I've been asked lately:)
