Here is a way to tweak colours in Photoshop. It is super, super easy.
1. Open picture
2. Go to Image and then Adjustments
3. Go to Hue/Saturation
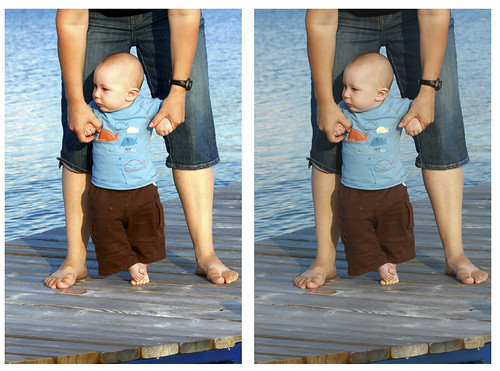
4. Under edit, change `master' to individual colours. For example, on the picture below, I adjusted the blue. I increased the hue and saturation and decreased the lightness. Click `okay' when happy.
5. Go to Brightness/Contrast and in this case, I increased the brightness and increased the contrast. Click `okay'.
There ya go! The left side has been photoshopped, really not too different. This original picture has pretty good colouring already but you get the idea. Gives it some zip.
Wanna know how to whiten teeth? This is taken from Scott Kelby's `The Photoshop CS Book For Digital Photographers'. By the way, I got this book used off of Amazon.ca...it's normally $60.99 and I got it shipped to me for under $30. Ya. Awesome.
1. Open photo.
2. Switch to Lasso tool and draw a selection around the teeth (zoom in so you don't get the gums!)
3. Under the Select menu, choose Feather. Enter 1 pixel and click OK.
4. Under Images, go to Adjustments, choose Hue/Saturation. Choose Yellows and drag saturation to the left.
5. Switch back to `Master' in the Edit menu and drag the lightness slider to the right. Not too far or you get a crazy white glow....remember that episode of Friends where Ross' teeth were glowing in the black light..ya, like that.
6. Click Okay and then Control D.
So, below shows the teeth whitened on the right. Then, I would go and adjust the contrast, saturation etc. to make the colours a little more vibrant.
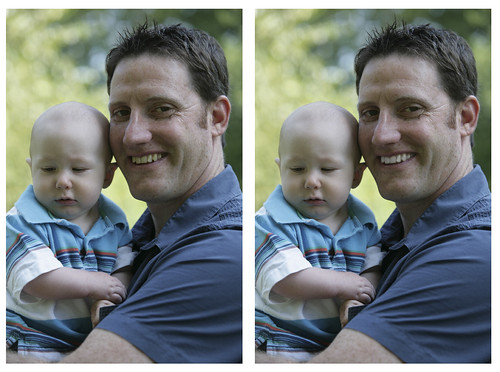
In conclusion, I'm not sure that I will ever use the tooth whitening tool due to the fake factor. Also, I do most of my light and colour adjusting in Lightroom but I'm assuming more people have a version photoshop.
Okay, seriously, any photography questions pour moi?

Nice work Louise. I'll be sure to read your new blog and ask some questions.
ReplyDelete